 |
RR 3D Prints |
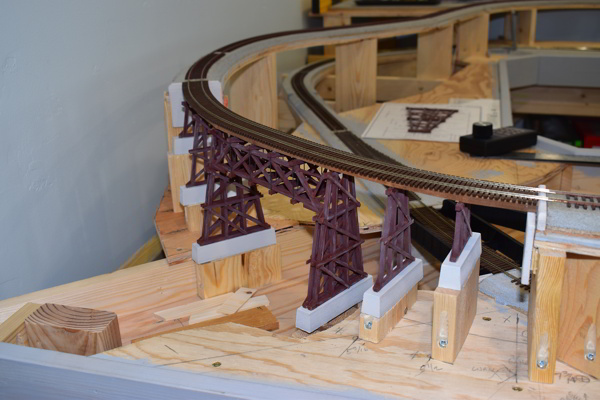
The trestle is 3D printed. See the master design below.
Click for Model Railroad Home Page
Here some of my 3D printed projects.
Creating 3D models and 3D printing were new to me as of December 2019. I have worked with AutoCad 2D for years including at work but adding the third dimension is like the difference between driving a car and flying an airplane.
One challenge I am working on is adding the physical displacement such as a cut stone face on an abutment or a tunnel portal. I have recently been provided with major insight on using Blender to add physical displacement to my models that will print. My original models used a displaced face on a thin panel that I created and then glue it on the model.
I gladly share any of my model or print files to those who want to print their own. Click on the Print File [ stl type ] to download it. Slicer programs will read this file and generate the print file for your selected printer.
Please contact me with any requests, questions or ideas.
I use SketchUp 2021 for most of my models and have been trying Fusion 360 recently.
Contact me if you would like the model file. Most of the parts in the interiors are done as separate components so you can use them to easily build your own interior.
| Description | Image | Print File | Type |
|---|---|---|---|
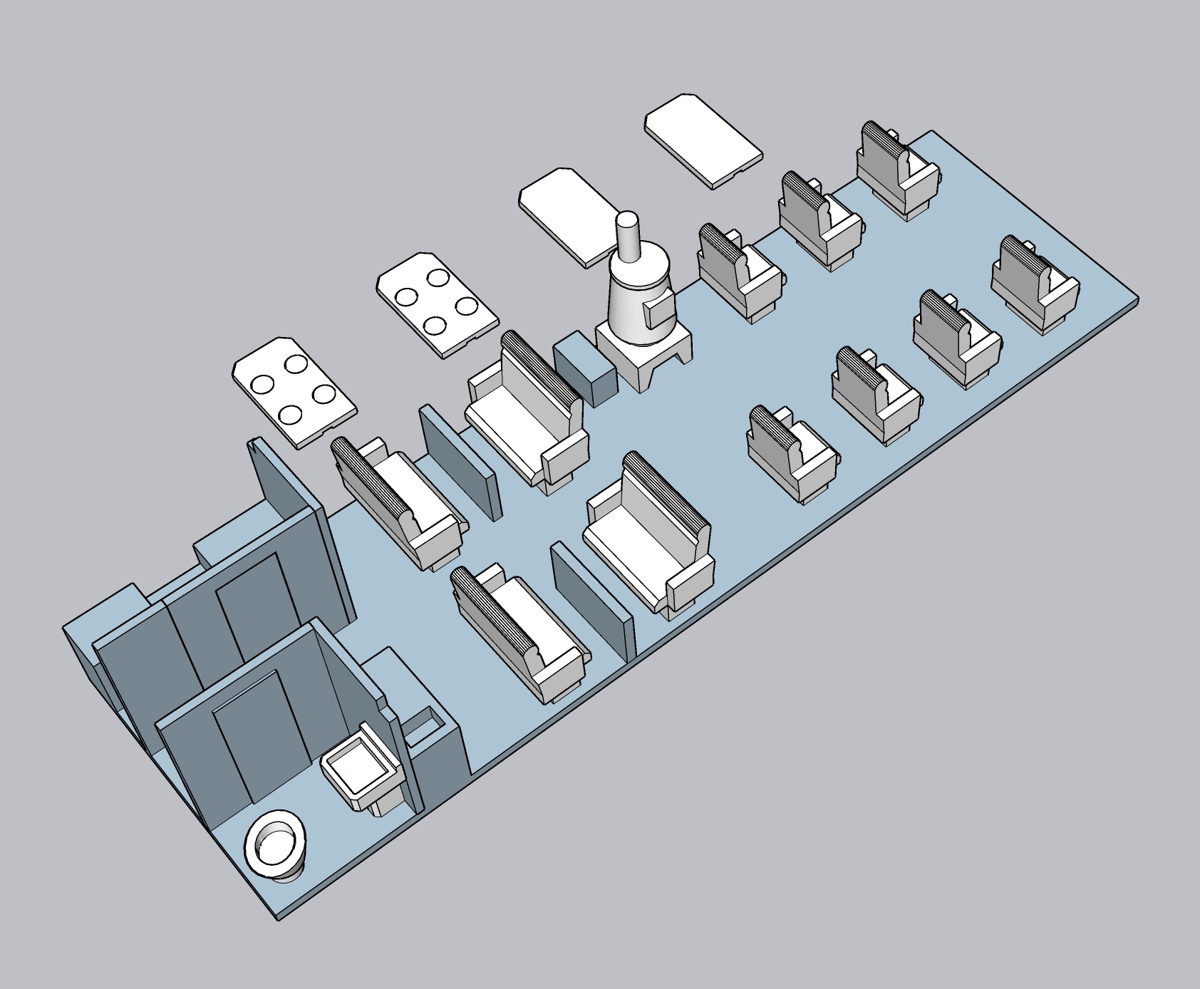
HO MDC Overton Combine interior Slicer settings: I set the layer at 0.15 Quality and then modify the height so layers 0 to 1.0 are set at 0.20. I also set the infill angle so the top of the floor layer is perpendicular to the long walls. |
 |
Combine | stl |
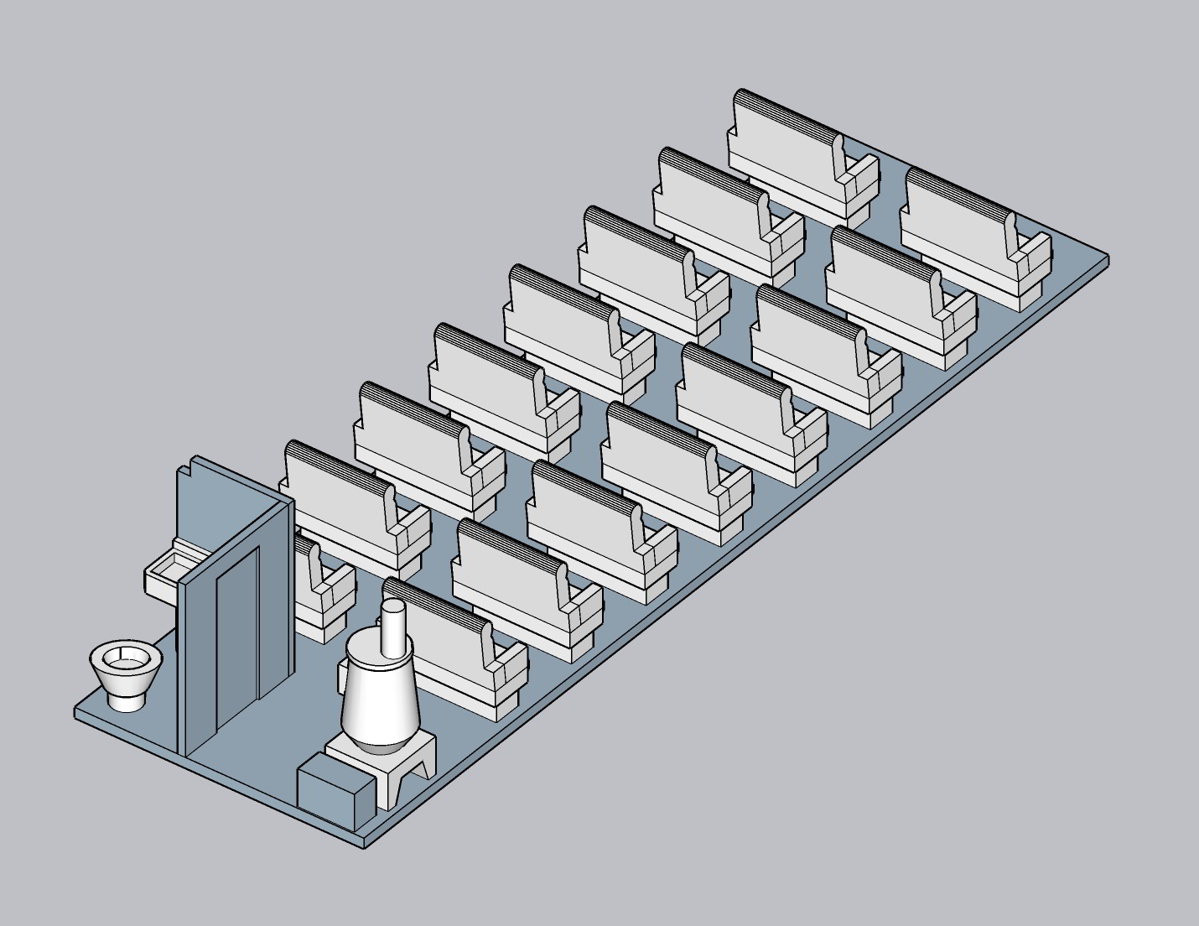
HO MDC Overton Coach interior Slicer settings: I set the layer at 0.15 Quality and then modify the height so layers 0 to 1.0 are set at 0.20. I also set the infill angle so the top of the floor layer is perpendicular to the long walls. |
 |
Coach | stl |
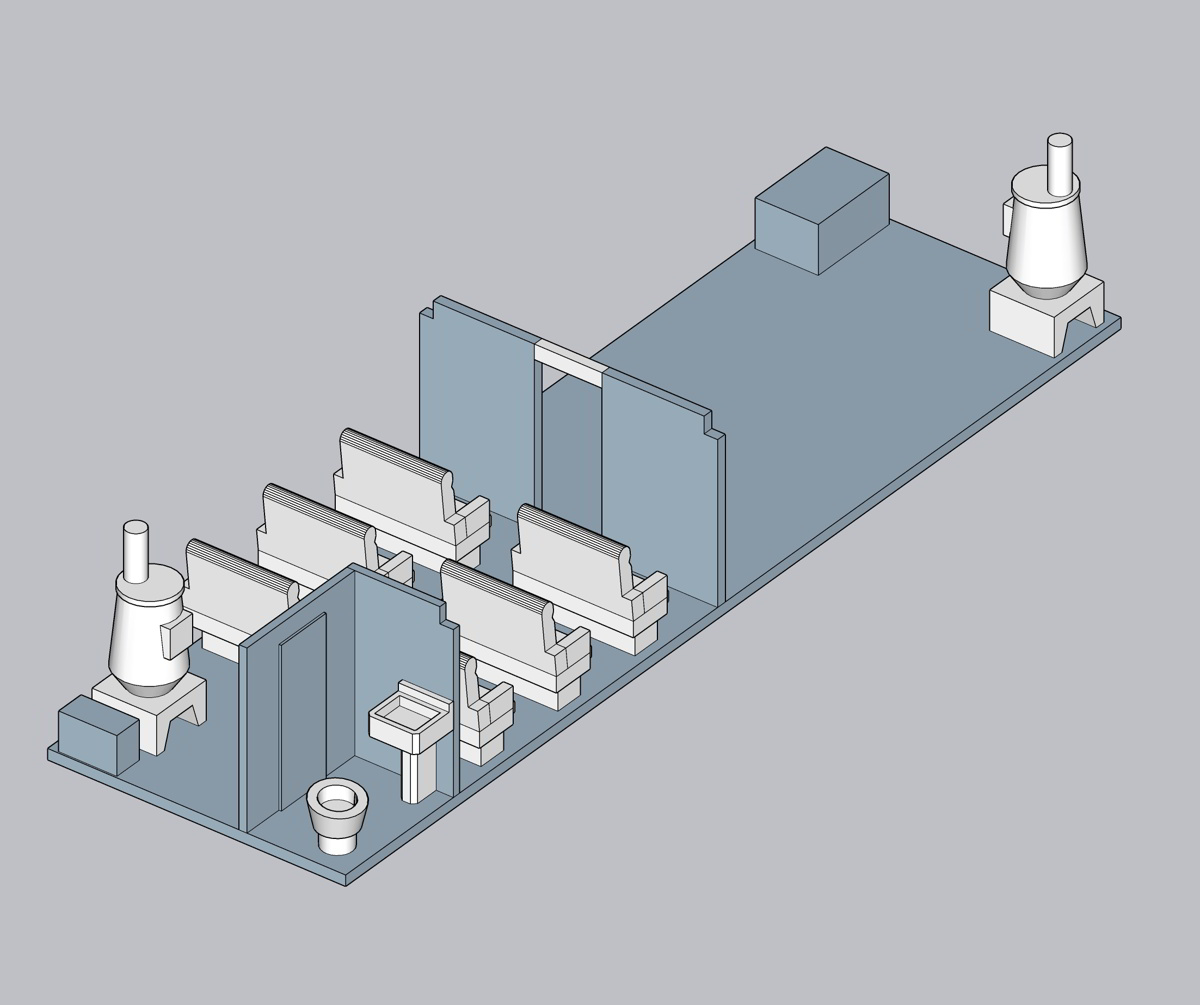
HO MDC Overton Business Car interior Slicer settings: I set the layer at 0.15 Quality and then modify the height so layers 0 to 1.0 are set at 0.20. I also set the infill angle so the top of the floor layer is perpendicular to the long walls. Lounge seats facing inward Two table tops are included, one with dishes and one plain. They need to be glued on the risers. |
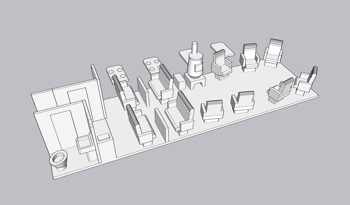 |
Business | stl |
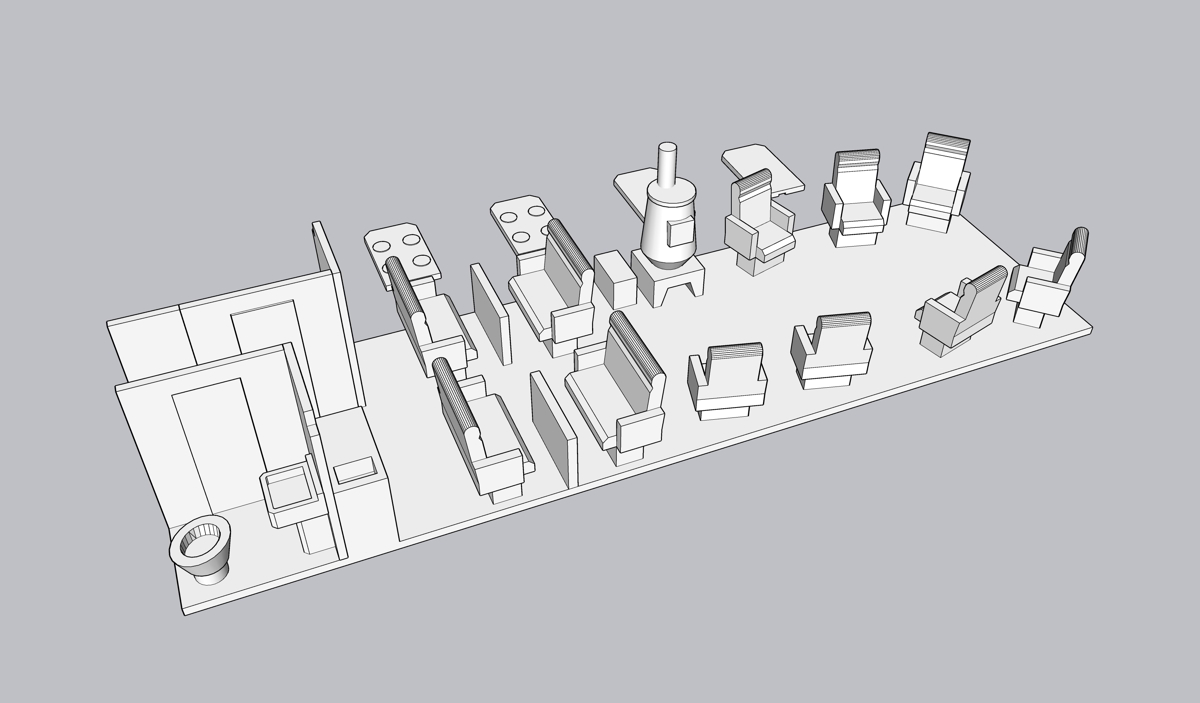
HO MDC Overton Business Car interior Slicer settings: I set the layer at 0.15 Quality and then modify the height so layers 0 to 1.0 are set at 0.20. I also set the infill angle so the top of the floor layer is perpendicular to the long walls. Lounge seats facing the rear Two table tops are included, one with dishes and one plain. They need to be glued on the risers. |
 |
Business | stl |
HO Track Tool makes it easy to get smooth curves with flex track. Code 100 works on all. Running this along the flex track with a twisting motion will create a sweeping curve. Particularly good to use with Micro Engineering track. |
 |
stl | |
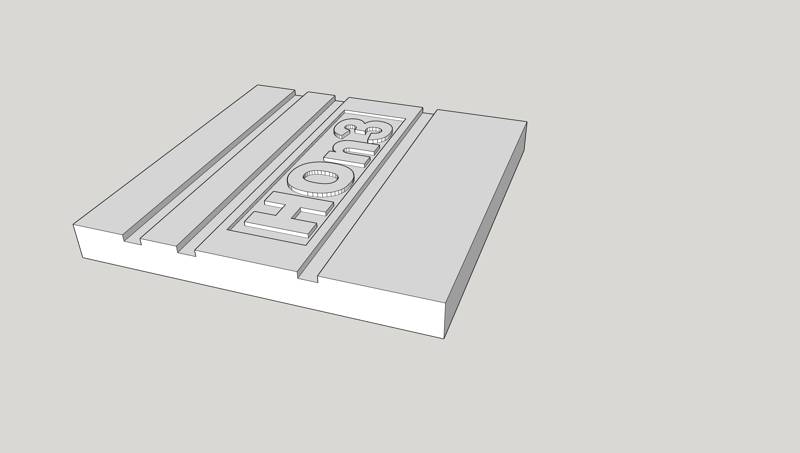
Track Tool for HOn3 and dual gauge.
|
 |
HO-HOn3 | stl |
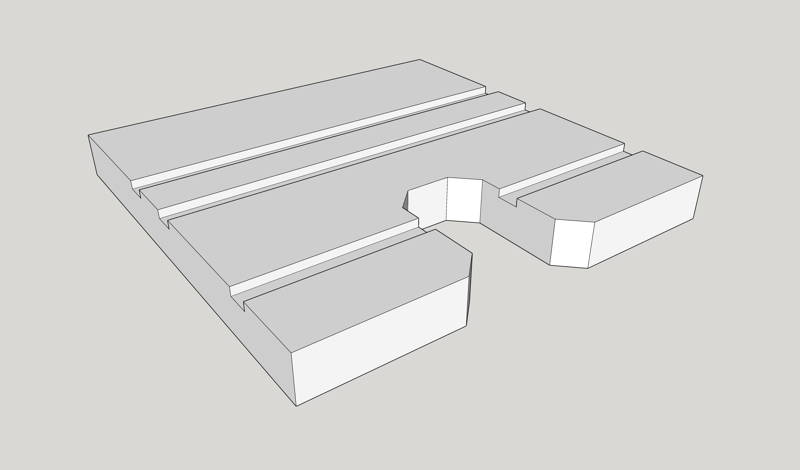
Track Tool for HOn3 and dual gauge with a notch to support the rail for drilling. See my page about attaching track feeders by drilling a hole in the rail.
|
 |
HO-HOn3/notch | stl |
Micro Speaker box 15x11x |
 |
stl | |
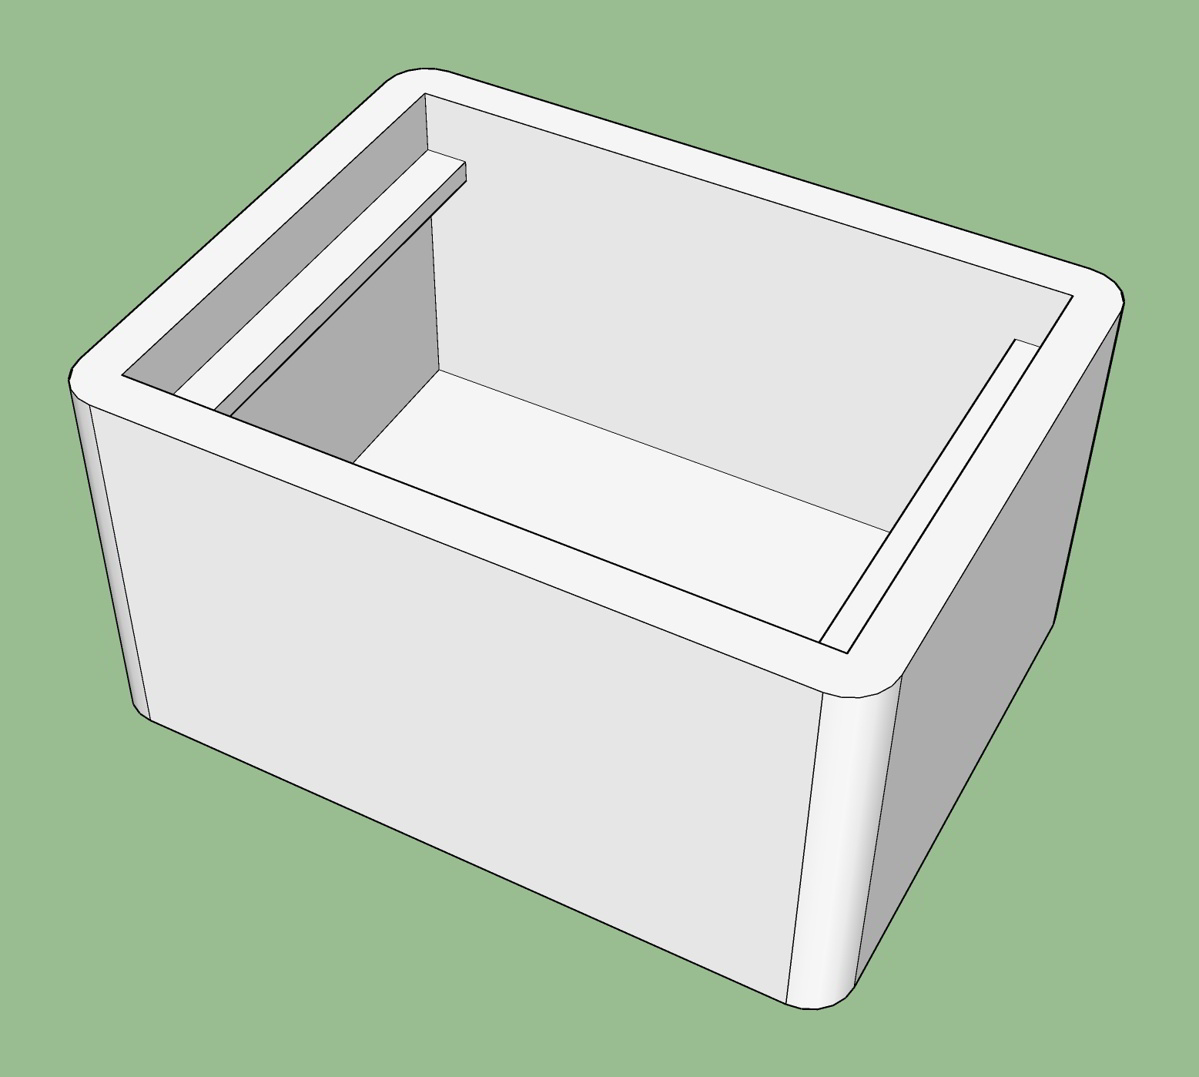
NCE USB box with cover Note: The holes in this box are 2.7mm (0.1065") diameter. This will allow using #4 sheet metal screws which is what I use or the M3 equivalent. |
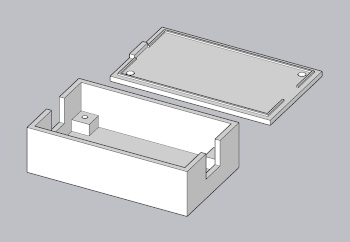 |
USB | stl |
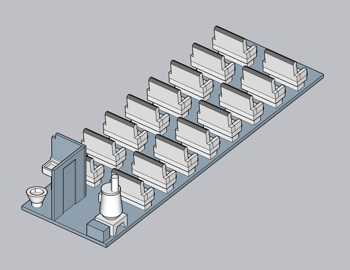
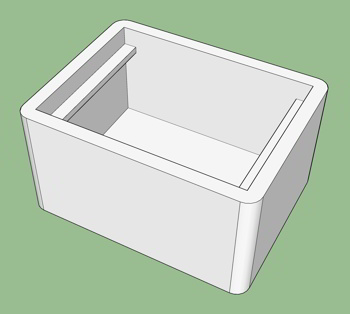
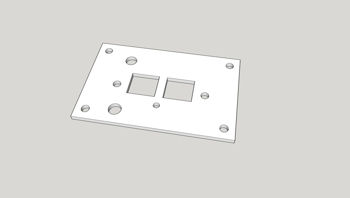
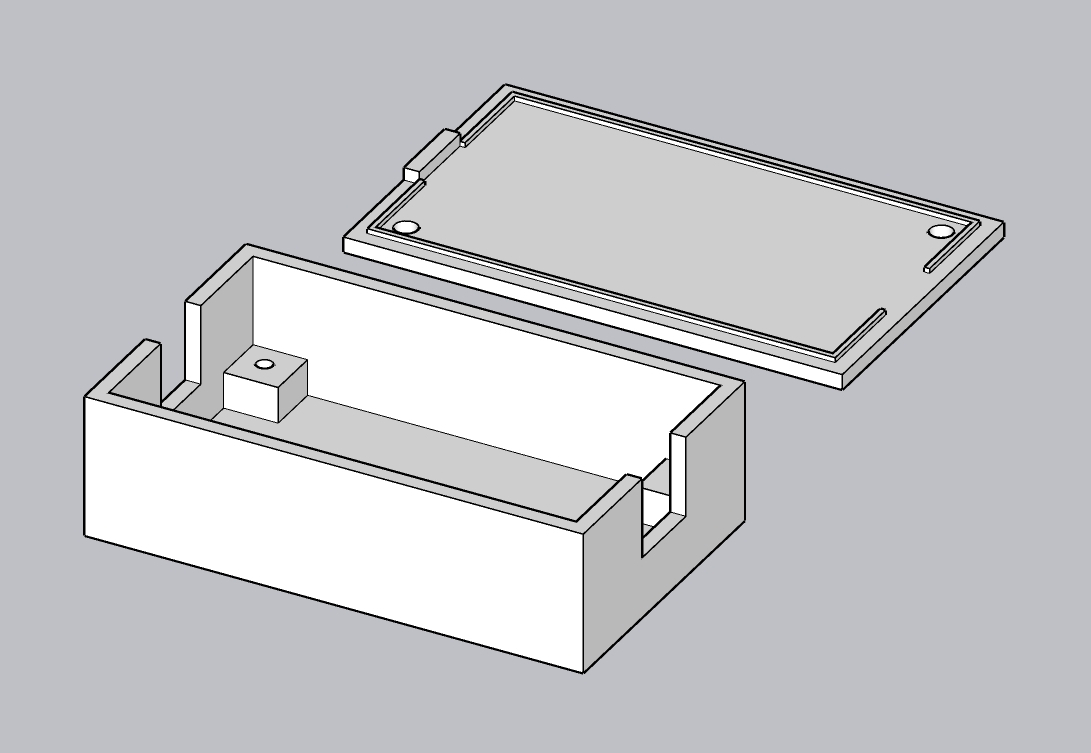
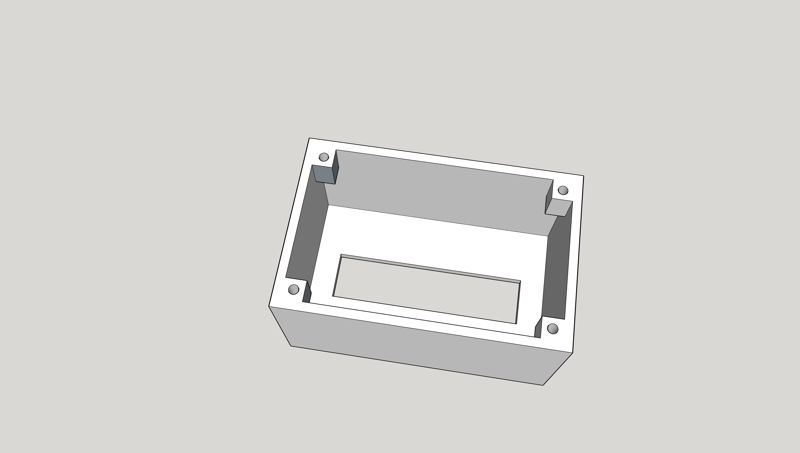
NCE PCP box to house the PCP panel. It works with both the 3 and 4 connector versions. Use this box with the NCE cover plate or print one of the custom plates shown below. Note: The holes in this box are 2.7mm (0.1065") diameter. This will allow using #4 sheet metal screws which is what I use or the M3 equivalent. The hole pattern matches the NCE faceplate. See my NCE PCP with Auto Switch for more information. |
 |
NCE PCP Box | stl |
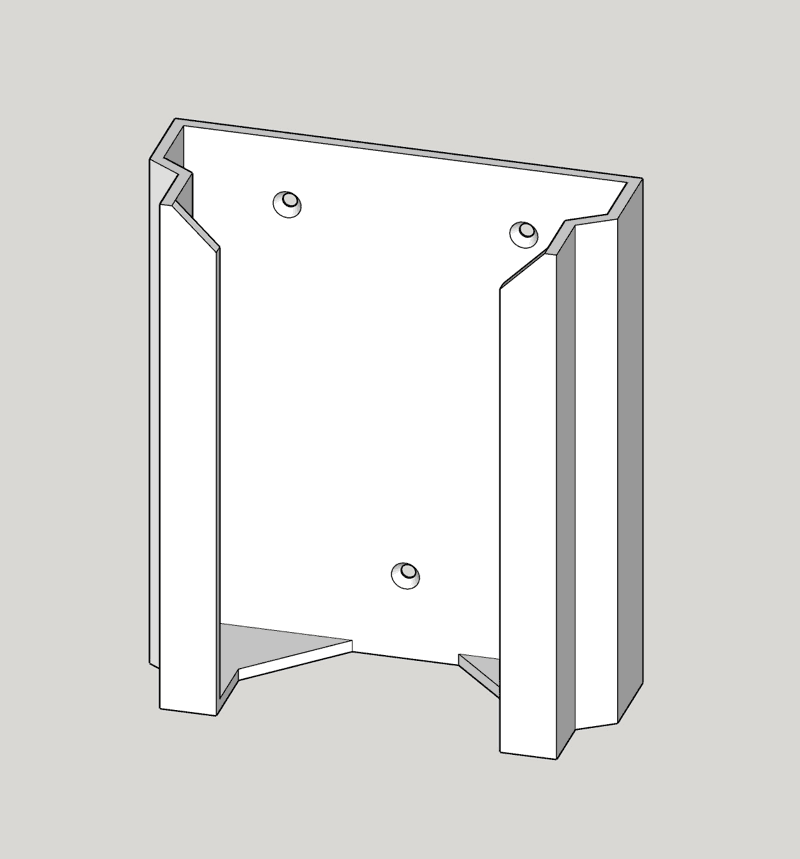
NCE PCP box cover with Auto Switch bracket (rear view). Use with the box above or alone to add the Auto Switch, DPDT switch and LED as per my design. See my NCE PCP with Auto Switch for more information. The hole pattern matches the NCE faceplate. |
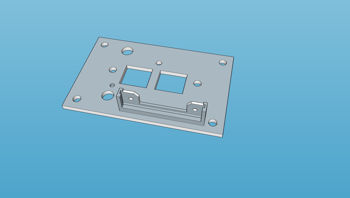 |
NCE PCP coverBkt | stl |
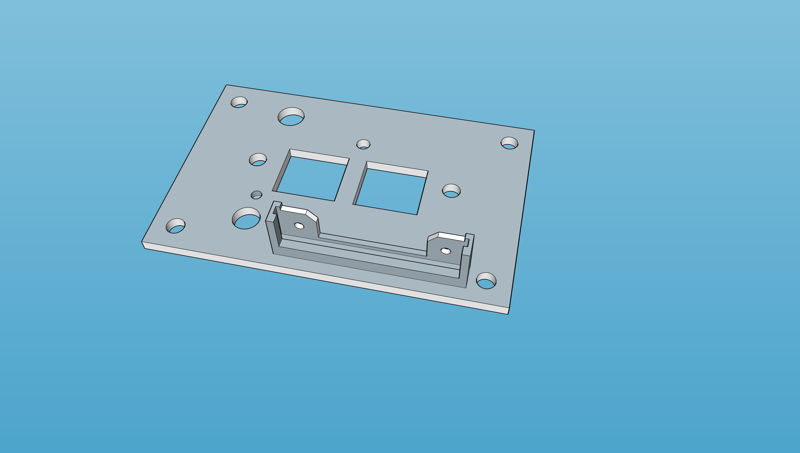
NCE PCP box with a bracket inside for the Auto Switch. This was the first design and I would prefer the box above with the bracket on the cover. See my NCE PCP with Auto Switch for more information. Note: The holes in this box are 2.7mm (0.1065") diameter. This will allow using #4 sheet metal screws which is what I use or the M3 equivalent. The hole pattern matches the NCE faceplate. |
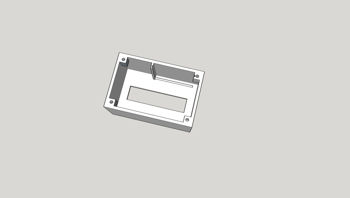 |
NCE PCP Box 2 | stl |
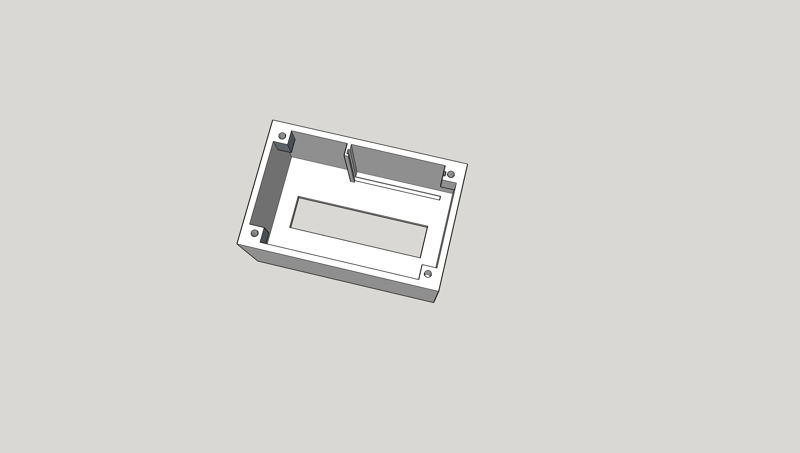
NCE PCP box plain cover with openings for the DPDT switch and LED (front view). Use with the box above that has the bracket inside. See my NCE PCP with Auto Switch for more information. The hole pattern matches the NCE faceplate. |
 |
NCE PCP cover | stl |
|
Bracket to mound your NCE UTP or PCP panel under a 3/4" facia board |
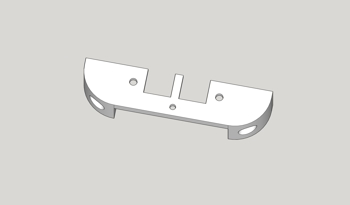 |
NCE UTP/PCP Mount | stl |
| My basic trestle plan | 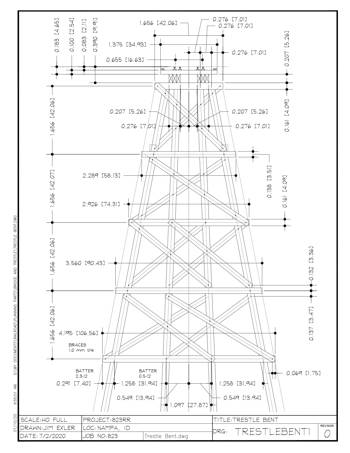 |
Trestle Plan | |
NCE Pro cab / Power cab / Cab06 holder There is also room for a cell phone up to 75.0 mm wide (750). Another for the newer wider phones 81.5 mm wide (815) |
 |
stl | |
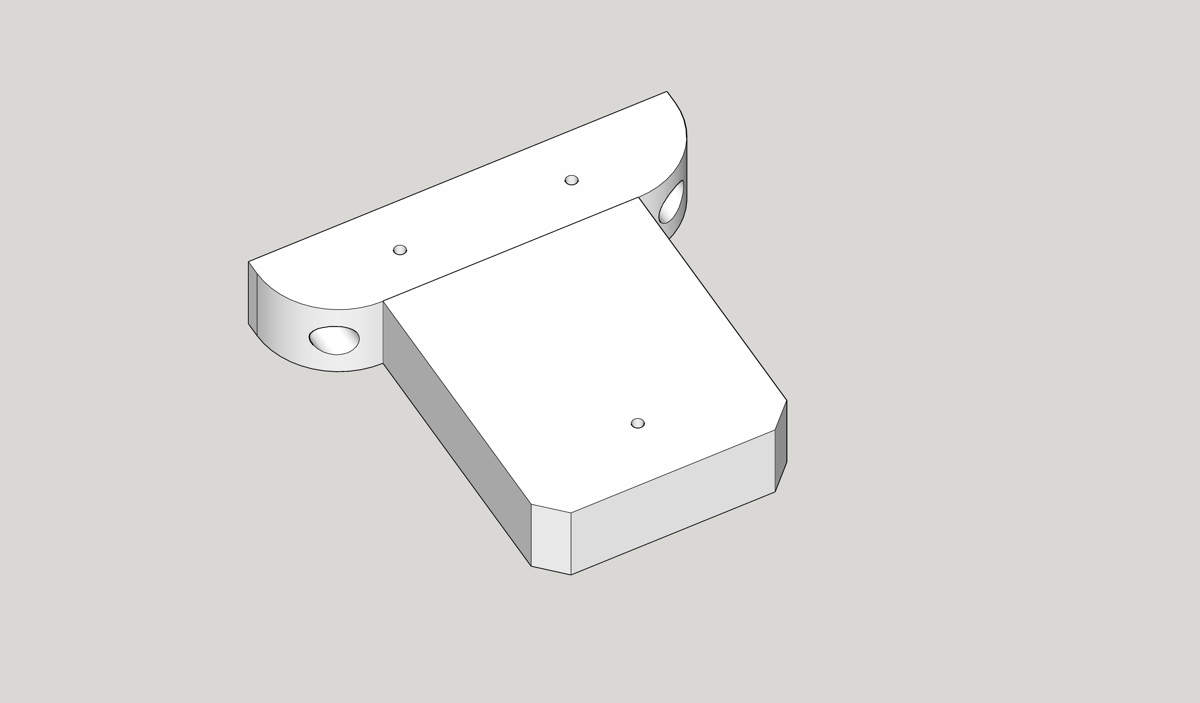
A low mount bracket that will fasten under a 3/4" wide facia on the layout to mount the cab holder listed above so it does not stick up too far. |
 |
Low Mount Bracket | stl |
| HO 34' Excursion Car |  |
Excursion Car Page | html |
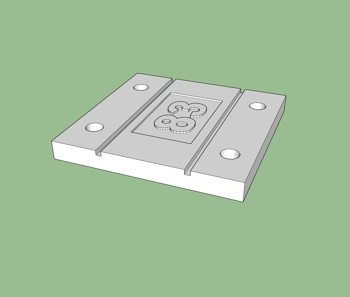
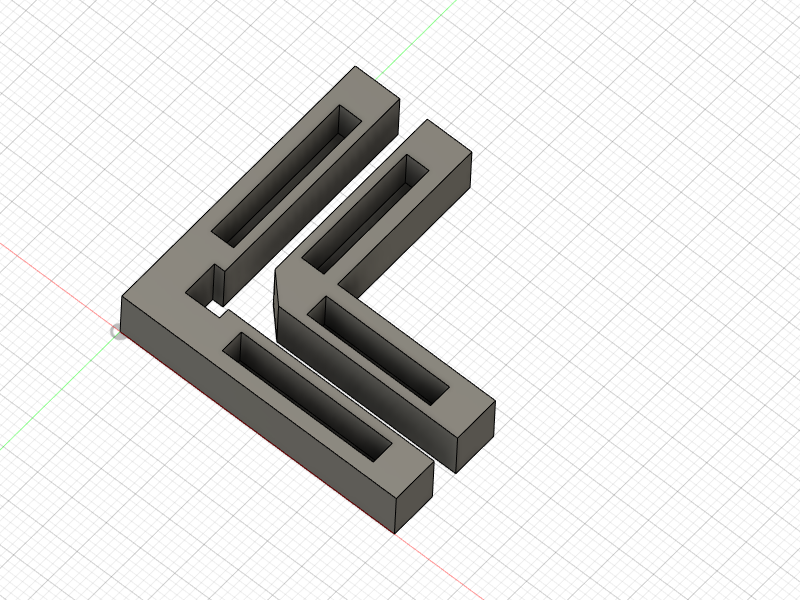
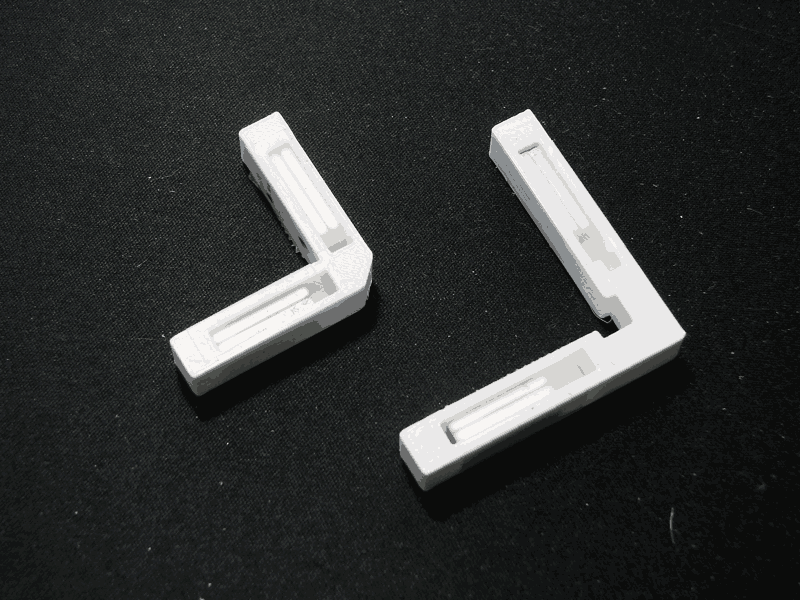
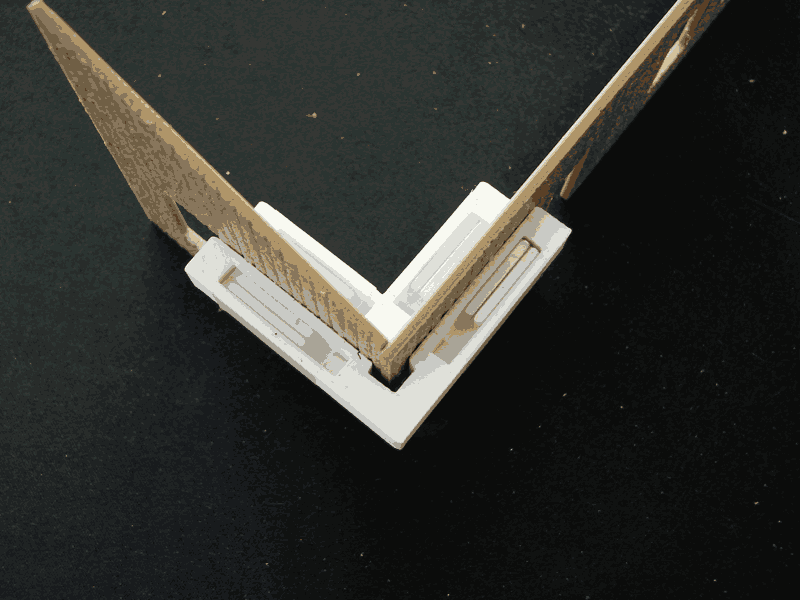
Magnetic Corner Clamps These will work great for structure assembly. Clamps with 2 - 15x5x2mm rare earth bar magnets in each slot. Set the polarity of the magnets as shown in the picture so they will interchange with each other. N vs S is your choice but standardize for all. You can use a compass to find North. I used Scotch tape to cover the slot. The slot is actually 20 x 6 x 3.8 mm. With the Scotch tape cover, the magnets can move to find the strongest position. |
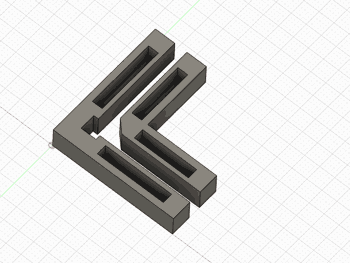 |
Corner Clamp Pr | stl |